Automation
UI Inspector: point at what you want to tap
Inspect the phone's screen, click the button you want, and let the editor write the node for you — instead of guessing coordinates or typing a matcher by hand.
5 min read
A flow is only as good as the thing it points at. Tell a Click node to tap the pixel at 540, 1180 and it works — until the next phone, the next screen size, or the next time the app moves that button one row down.
The UI Inspector is how you stop guessing. The editor describes it in one line: "A tool for inspecting the device screen so you can pick the exact element to act on, then create or update a node from it instead of typing by hand."
You point at the button. The Inspector writes the node.
Open it and press Refresh
Inspector sits in the editor toolbar, between AI and Session — the whole bar is laid out in Create your first flow.
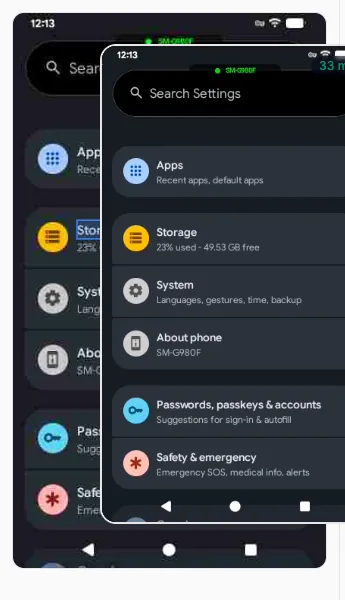
Open it and press Refresh. That does two things at once: it photographs the phone's screen, and it reads the structure of that same screen. The picture and the structure are always captured together, so what you click on the photo and what you see in the list are guaranteed to be the same moment in time.
What an element is
Everything you can point at is an element. The app's own wording:
"Every button, input field, text line or icon on screen is an element."
And where it matters, in the Click node's own hint: "An element is one thing on the screen (a button, an input, a line of text). Either tap a fixed coordinate, or let the device find the element and tap it."
The second option is the one you want, and the Inspector exists to write it for you.
The three areas
Screen
"A screenshot taken when you press Refresh. Click an element on the image to select it."
Tree
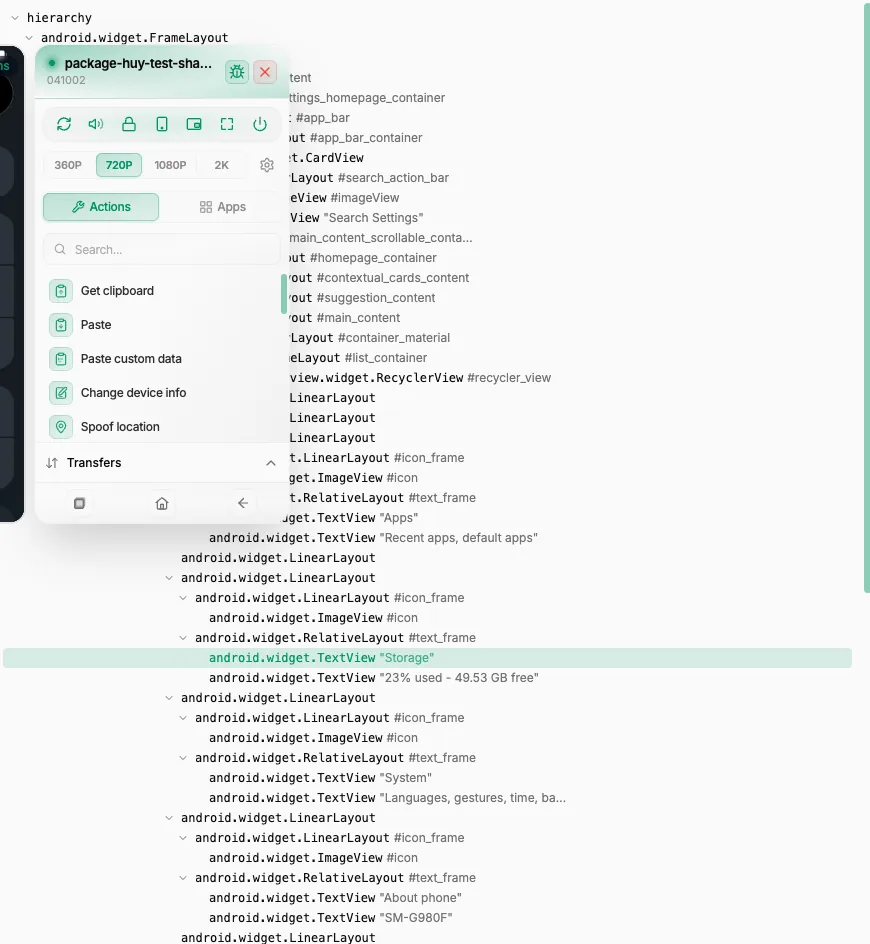
"The hierarchy of every element on screen. Click a row to select it; elements matching the matcher are highlighted."
Details
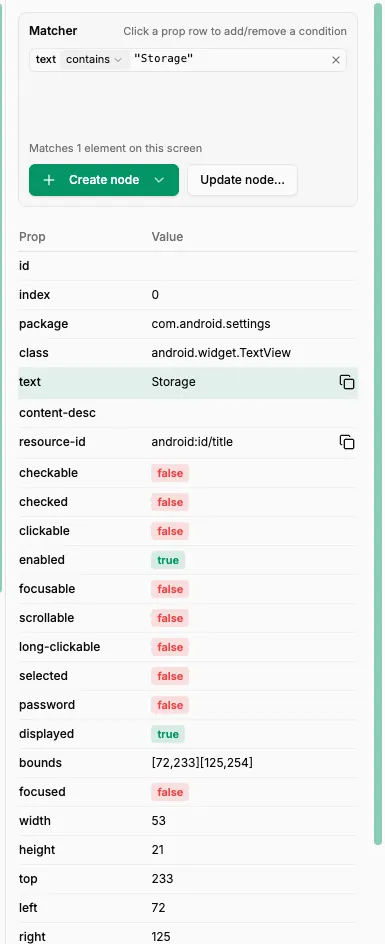
"Props of the selected element plus the Matcher block. Click a prop row to add or remove a condition, then press Create node or Update node."
The screenshot and the tree are the two ways in; the details are what you do with the result. The Inspector says as much when you have not picked anything yet — the details area reads "No element selected — click the screenshot or the tree on the left."
Picking the thing you want
Click it on the screenshot. Fastest when you can see the button — you get the element under your cursor.
Or find it in the tree. Better for what you cannot click: an element with no text on it, one sitting underneath another, or a whole row when you keep landing on the label inside it.
Read the props in Details. A table of Prop and Value — what the app calls this thing, what text it shows, what type of widget it is.
Turn a prop into a condition. Click the row. The hint on every row says it plainly: "Click to add/remove this matcher condition", and the condition lands in the Matcher block below.
Aim for one match. The Matcher block tells you how many elements your conditions currently catch on this screen.
Press Create node — or Update node… to put the matcher on a node you already built.
How many elements did you catch
This is the one number to watch, and the Inspector's own first tip is about it:
Aim for "Matches 1 element". Too many matches: add a condition; no match: remove one.
Two other things the Matcher block will tell you, both worth stopping for:
- "No element matches on this screen" — your conditions catch nothing at all. Either one of them is too strict, or you typed over a value.
- A warning that the conditions match some elements but not the one you selected. The flow would still run, and it would tap the wrong thing. That is the failure hardest to spot later, and the Inspector hands it to you now.
If the element has nothing readable on it, the block says so and points you elsewhere: "No text / desc — click the resource-id or class prop".
Which prop to build on, and the four ways to compare it, are the subject of Make your taps survive tomorrow.
Create node, or update the one you have
Create node gives you a new node with the matcher already filled in.
Update node… takes the matcher you just built and assigns it to a node already in your flow — handy when the app moved a button and the rest of the flow is still good.
Updating replaces, it does not merge. The dialog says so: the matcher goes "to the selected node. Its current matcher will be replaced entirely."
If the node you pick was tapping a fixed coordinate, you are told that too — "This node uses coordinates — it will switch to element selection." That is usually an upgrade, but it is still a change, so read the line before confirming.
If there is nothing to update, the reason is simply that the flow has no node that accepts an element yet — the dialog says The graph has no node that takes a matcher. Create one with the "Create node" button.
Refresh every time the screen moves
The screenshot is a photograph, not a live view. Tap something on the phone and the Inspector is now showing you the past.
"Press Refresh whenever the device screen changes. The screenshot and the tree are always captured together."
Building a flow screen by screen means the same short loop each time: drive the phone to the screen you need, Refresh, pick the element, make the node. Then move on to the next screen.
Summary
- Inspector in the editor toolbar; Refresh captures the screenshot and the element tree as one pair.
- Three areas: Screen to click what you can see, Tree to reach what you cannot, Details to read the props and build the matcher.
- Click a prop row to add a condition, and aim for "Matches 1 element" — too many, add one; none, remove one.
- Create node builds a new node; Update node… replaces an existing node's matcher entirely.
- Refresh again every time the phone's screen changes.