Account
API tokens for your own scripts
Create, limit and revoke API tokens for your own scripts: shown once, capped at 10, and Read & write tokens bypass 2FA.
4 min read
An API token lets your own script or app call the xCloudPhone API as you, without a browser login. It works like a password made for machines: whoever holds the token acts as your account, within the scope you gave it. This page shows how to create one, what the settings mean, and the three warnings you should read before you copy anything.
Where to find it
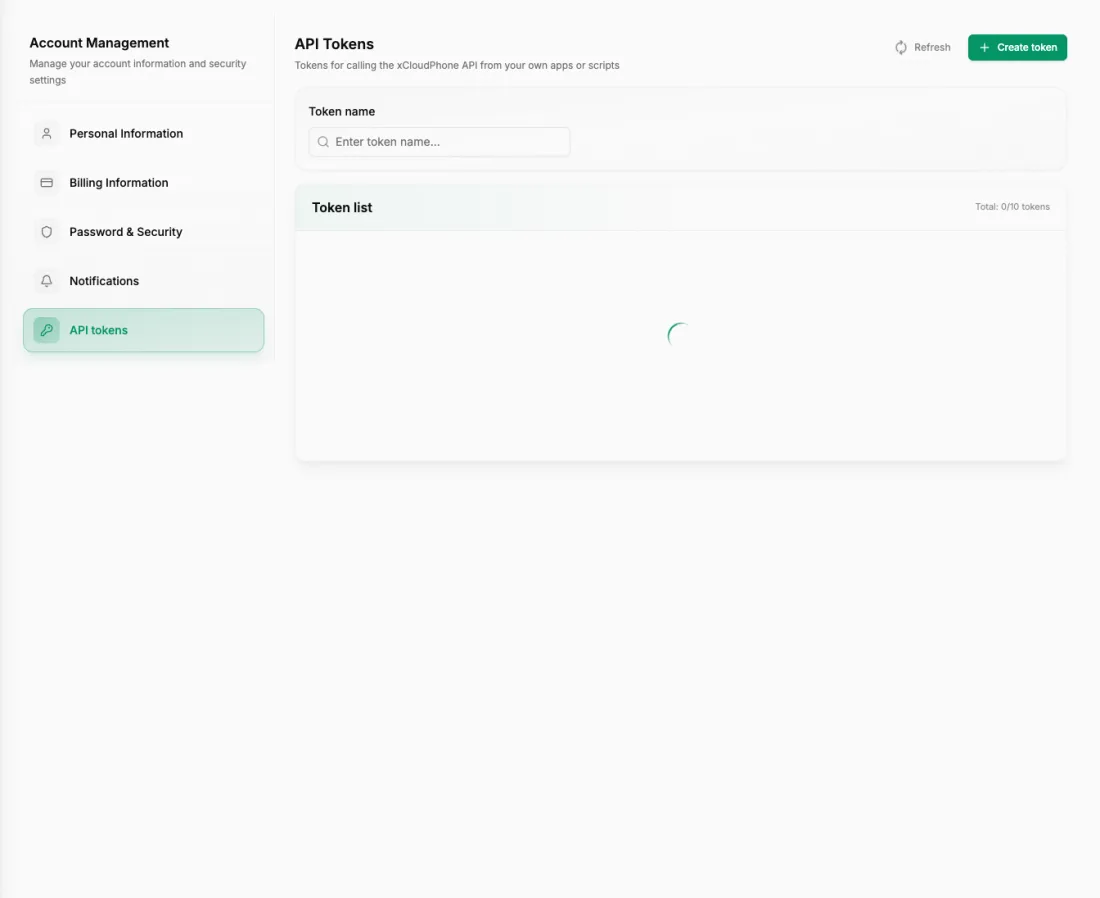
Open Profile and choose API tokens. There is no separate menu item for it. On a phone, it is the last section of the Profile page. You can also go straight to app.xcloudphone.com/dashboard/profile#api-tokens.
The page is titled "API Tokens" — "Tokens for calling the xCloudPhone API from your own apps or scripts". It lists each token with its name, prefix, scope, expiry, when it was last used and when it was created, and shows how many you have, for example "Total: 0/10 tokens" on a new account.
Create a token
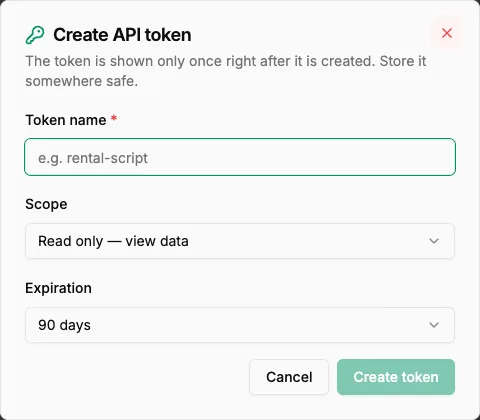
Click Create token — The button sits at the top of the list.
Name it — Give it a name you will recognise later, for example rental-script. Up to 100 characters.
Choose the scope — Read only ("view data") or Read & write ("view and change data"). The default is Read only.
Choose the expiration — 30 days, 90 days, 365 days or Never expires. The default is 90 days. "A token without an expiry stays valid until you revoke it."
Copy it — The "Token created" dialog shows the token. Press Copy token, store it somewhere safe, then press I saved the token.
Read only or Read & write
| Scope | What a script holding it can do |
|---|---|
| Read only | Fetch data only. It is not allowed to change anything on your account. |
| Read & write | Fetch data and change it, on your behalf. |
Give a script the smallest scope that does the job. Most reporting or monitoring scripts only need Read only.
Three warnings
The token is shown only once. "Copy the token now — you will not be able to see it again." After you close the dialog, only the first few characters (the prefix) remain visible in the list. Lose it, and the only fix is to create a new token and revoke the old one.
You can hold at most 10 tokens. At the limit you get "You have reached the limit of 10 tokens. Revoke an old token and try again." Expired tokens still count towards the 10 until you revoke them, so clean out old ones from time to time.
A Read & write token bypasses two-factor authentication. The form says it in plain words: "Read & write tokens bypass two-factor authentication. Treat one like a password and never share it." Even if you turned on 2FA, a script with this token needs no code. Keep it out of screenshots, chats and public repositories — and revoke it at once if it may have leaked.
Manage your tokens
- Rename. Only the name can be changed: "Only the display name can be changed. Scope and expiration stay the same." To change the scope or the expiry, create a new token and revoke the old one.
- Revoke. Choose Revoke token, then confirm. "Any app using it loses access immediately. This cannot be undone."
- Spot stale tokens. The Last used column shows "Never used" for a token nothing has called yet, and expired tokens carry an Expired badge. Revoke both kinds.
Use the token in a script
Send the token with each request in the Authorization header:
Authorization: Bearer <your token>
Store the token in an environment variable or a secrets manager, never in front-end code.
There is no public API documentation page yet. If you need a specific endpoint, contact support.
How far a token reaches
In tests on a live account (September 2026), a token reached further than you might expect:
- It can read almost everything in your account — even a Read only token. That covers your rentals, transactions and wallet history, files, proxies, automation flows, notifications and more. Treat every token like a password, not only the Read & write ones.
- Four things always need a normal web sign-in: managing tokens themselves, editing your profile, changing your password, and setting up or turning off two-factor authentication. A token that tries gets
403withSESSION_REQUIRED. - The scope decides whether a token can write. A Read only token that tries to create, change or delete something is rejected with
401UNAUTHORIZED. To write, create a Read & write token.
Summary
- Create tokens under Profile → API tokens; pick a name, a scope (Read only or Read & write) and an expiration.
- The token is shown once — copy it right away. You can hold at most 10, and expired ones still count.
- Even a Read only token reads almost your whole account, and a Read & write token bypasses 2FA: treat every token like a password.
- You can only rename a token; to change anything else, or if it leaks, revoke it and create a new one.